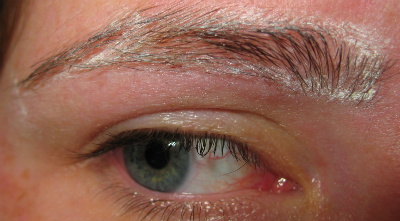
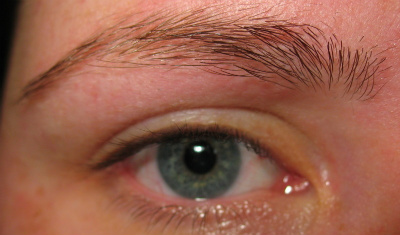
I’m a big fan of full, natural-looking but well-maintained eyebrows. This preference no doubt stems from my own time on the eyebrow roller coaster. For the first 25 years of my life, I wore my eyebrow full and natural. (Yes, EYEBROW, singular. OK, maybe I’m exaggerating, but my natural eyebrows barely separated in the middle.) Then I started plucking – minimally at first, but pretty soon I was going for broke and ended up with skinny, sad, uneven strips of hair. It took many years to figure out what to pluck and what to leave, and how to shape my (straight, non-archy) brows for my face.
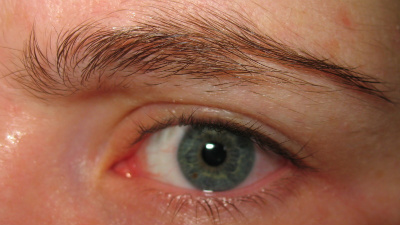
It really is more about what you DON’T pluck. So, with that in mind, here’s a brief photo tutorial for those are you who want to learn how to shape and maintain your own eyebrows. I had some nice & bushy material to start out with since I was allowing my brows a month or so of regrowth – check THIS out:
Again, I want to emphasize that it’s more about what you don’t pluck. In the photo above, the main problem is that several of my brow hairs are too long to lay neatly in place. Only once I’ve pruned them a bit should I go in with the tweezers.
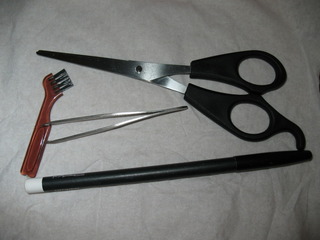
So, here are my tools for the task:
A brow brush, tweezers, scissors (tiny cuticle scissors are recommended but this is what I had on hand), and a white eyeliner pencil.
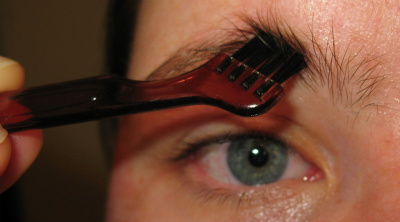
Trimming the hairs so that there are as few “outliers” as possible is the first step. Here, I brushed my brows straight up so I could see which hairs reached above the natural line of my brow:
(Bloodshot eyes and shower-damp skin are optional for this step… I took these first thing in the morning a few weeks ago, pre-caffeine.)
Next, I CAREFULLY trimmed the hairs that were too long, a tiny bit at a time. You don’t want to make an area look too blunt, so don’t cut too close to the top line of the brow. Little snips, and go slow.
You can also brush the brow hairs down and trim from below, just watch out for your eyelashes! Here’s the freshly trimmed eyebrow:
Now it’s quite a bit easier to see which brow hairs need to stay and which need to go. This is normally where I go ahead and start plucking, since I’ve done this so many times before. But for those of you who aren’t yet sure what shape to make your brows, or aren’t confident that you’ll pluck the right hairs, you can use the white eyeliner pencil to mark your ideal brow shape and then limit plucking to outside of that line.
How to determine your ideal brow shape? There are lots of options, but a tried-and-true method is to use the pencil to make a series of three marks: the inside of the brow (achieved by placing the pencil vertically between your nostril and the inner corner of your eye), the high point of the brow (achieved by lining up the pencil between your nostril and the outer edge of your iris), and the end of the brow (nostril to the outer edge of the eye, shown below).
(You can see I used much too thick and soft a pencil to make these marks – you’ll be able to make more accurate marks with a drier, harder pencil that’s as sharp as you can make it. And it doesn’t have to be white; that just stands out well against darker brow hair.)
If you like, connect the dots to give you the approximate shape you desire. (For more on selecting a brow shape for your face, check out this website – great resource!)
(Again, the pencil is much too soft for this purpose, but you get the idea.)
Now, it’s time to start cautiously plucking the outlying hairs, preferably one at a time. Do yourself a favor and use a regular mirror for this, NOT a magnifying mirror – the magnification tends to make you overzealous with your plucking. (It will also make every pore and line in your face look like a crater or a canyon… trust me, no one sees you that way, so why should you see yourself that way?) It’s ALWAYS better to pluck less than you think you need to. Sleep on it!
Here’s my freshly plucked brow:
Now, you’ll notice that some areas of my brows are sparser than others. This is natural, especially as we age. (And it’s a REALLY good reason not to overpluck, because most people end up with less and less hair growing back in as they get older!) For flash photography in particular, I think almost all brows benefit from a bit of filling in to make them look more finished. In the following photo, you can see the difference between the left and right brows (both are slightly filled in, but one is filled in more opaquely than the other):
How much you choose to fill in your brows can depend on the makeup you’re wearing. If I had on barely any makeup, I’d go for a barely-there brow fill (my right eye above, on the left). But if I was rocking a smokier eye, I would also emphasize my brows enough to balance out the look (my left eye, shown above on the right – confusing, isn’t it?) I like to use short strokes of a pencil to fill in my brows, but I use eyeshadow too – just apply with an angled brush. If you’re aiming for a more natural look, don’t make the inner corner of the brows too heavily filled in or squared off.
Another option is to let a pro shape your brows, and then once you’re happy with the new shape, just do maintenance (plucking strays and trimming as needed). That’s all there is to it!
